Now that you’ve explored the benefits and value of scenario simulation, it’s time to leverage this powerful feature and run your first simulation!
Step-by-Step Guide to Setting Up a Simulation
1. Ensure Your Advertising Portfolio is Ready
Before you start, it’s essential to have an active advertising portfolio set up in your Nexoya account. Your portfolio, which should include all the relevant campaigns across the various channels you’re using, is typically configured by your Customer Success Manager (CSM). If your portfolio hasn’t been set up yet, or if you’re unsure whether it’s complete, reach out to your CSM. They’re here to assist you in making sure everything is perfectly configured.
Tip: A complete and correctly configured portfolio is crucial for accurate simulations, as it ensures that all relevant campaigns are taken into account.
2. Configure Your Simulation
Once your portfolio is ready, you can start setting up your simulation by following these easy steps:
- Navigate to the “Simulations” Section: Head over to the “Simulations” section in your Nexoya dashboard. This is where you can manage all your simulations and check their status. To begin a new simulation, click on the “Create Simulation” button located in the top-right corner.
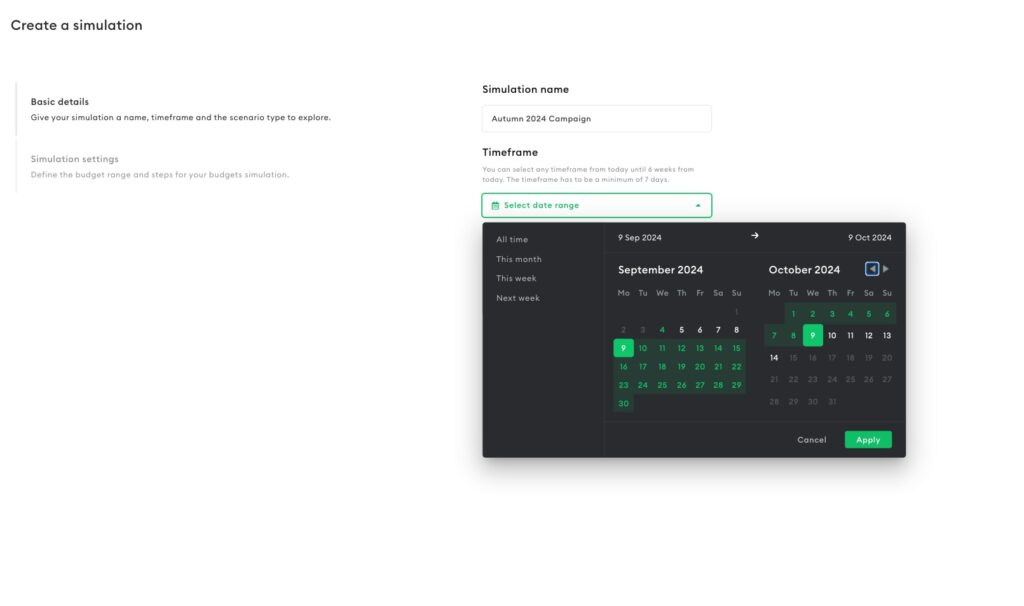
- Name Your Simulation and Define the Timeframe: Give your simulation a descriptive name (e.g., “Autumn 2024 Campaign”) and choose the timeframe you want to analyze. You can select any period from today up to six weeks in the future, with a minimum duration of seven days.

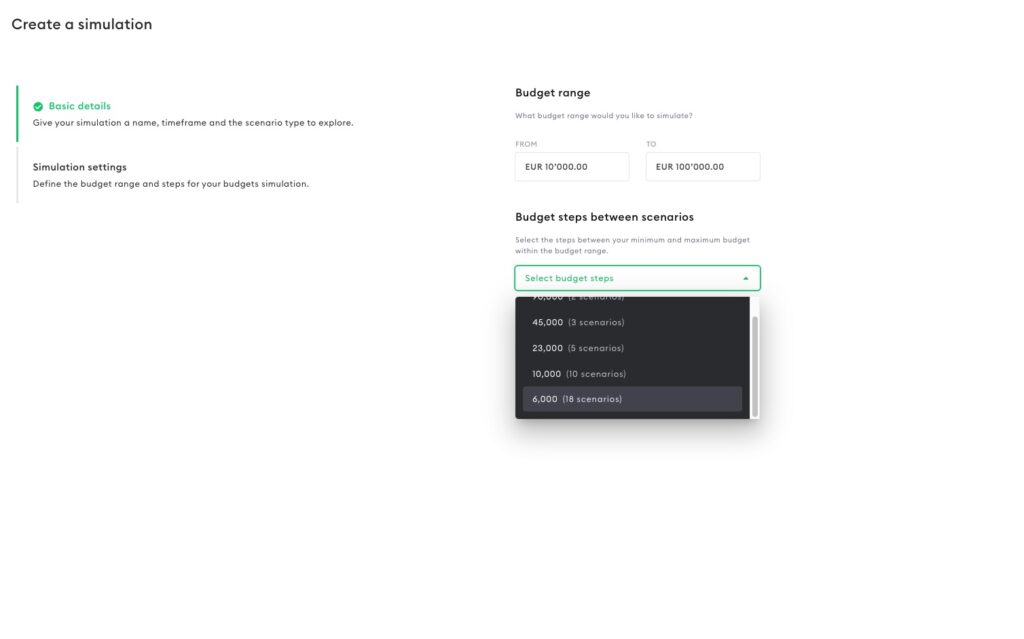
- Set the Budget Range: Determine the budget range you want to simulate. This allows you to explore different spending scenarios within your defined range.
- Adjust the Granularity: Decide how granular you want your simulation to be by defining the budget steps between scenarios. If you have specific scenarios in mind, you can manually add them by clicking on “Manually Add Scenarios”.

- Review Additional Configuration Details: Before launching the simulation, review and confirm any additional settings. For instance, decide whether the budget should include costs from content pieces that are disabled (skipped) from optimization, or if budget constraints like minimum/maximum limits should be ignored.
Note: Please note that the existing budget plan will be used to model the base scenario. This scenario will reflect both increases and decreases in budget allocation. The specific values for each scenario, including the base scenario (if available), will be displayed below. The simulation will account for all restrictions set at both the portfolio and content levels.
- Save or Start Your Simulation: If you’re not quite ready to run the simulation, you can save your current settings by clicking “Save for Later.” This will save your simulation as a draft, which you can find in the list of all your simulations. If everything is set, click on “Start Simulation” to begin the process. Depending on the size and complexity of your portfolio, it may take from 30 minutes to two hours for the simulation to run. You’ll be notified as soon as the results are ready for review.
That’s it—you’ve set up your first scenario simulation! Want to learn how to interpret the results? Discover more in our next article, “Scenario Simulation: interpreting results” where we’ll guide you through understanding the data and making the most of your simulations.
Note: To activate the feature, reach out to your Customer Success Manager or leave your request here.
